Step-by-Step Guide: Installing SSL Certificates on WordPress
In today’s digital landscape, security is more crucial than ever, particularly for website owners and operators. With the alarming rise in cyber threats, safeguarding user data and maintaining trust are top priorities. One of the most effective ways to enhance your website’s security is by installing an SSL (Secure Sockets Layer) certificate. This not only encrypts data exchanged between your visitors and your site but also boosts your search engine ranking while demonstrating to users that their information is secure. If you’re running a WordPress site, the process of installing an SSL certificate might seem daunting, but we’re here to simplify it for you. In this step-by-step guide, we’ll walk you through everything you need to know to successfully install an SSL certificate on your WordPress website, ensuring your site is not only secure but also positioned for growth in an increasingly competitive online arena. Let’s dive into this essential aspect of website management together!
Table of Contents
- Understanding SSL Certificates and Their Importance for WordPress Sites
- Choosing the Right SSL Certificate for Your Needs
- A Comprehensive Walkthrough of Installing SSL Certificates in WordPress
- Troubleshooting Common SSL Installation Issues in WordPress
- In Retrospect
Understanding SSL Certificates and Their Importance for WordPress Sites
SSL (Secure Socket Layer) certificates are essential security measures that protect sensitive data exchanged between users and your WordPress site. By encrypting this data, SSL certificates ensure that personal information, such as login credentials and payment details, remain confidential. In an era where online security breaches are increasingly common, having an SSL certificate not only safeguards your users but also enhances your site’s credibility. Search engines like Google prioritize secure sites, meaning that implementing SSL can positively affect your site’s ranking and visibility.
When you install an SSL certificate on your WordPress site, you not only protect your visitors but also build trust and foster a relationship with your audience. Noteworthy benefits include:
- Data Protection: Ensures that the data transferred between users and the server remains encrypted.
- SEO Boost: Websites with SSL certificates usually receive a ranking advantage on search engines.
- Trust Signals: Users are more likely to engage with a site displaying HTTPS in the URL bar, signaling security.
- Compliance Standards: Many regulatory standards require encryption for sites handling sensitive information.
Choosing the Right SSL Certificate for Your Needs
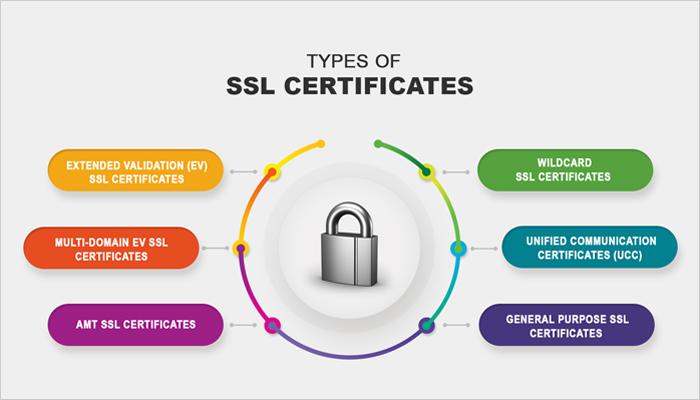
When selecting an SSL certificate, consider your specific needs and the level of security required for your website. There are various types of SSL certificates available, each designed to cater to different use cases:
- Domain Validation (DV): Ideal for personal blogs and small websites, providing a basic level of security.
- Organization Validation (OV): Suitable for businesses, as it verifies the organization’s identity, offering a higher level of trust.
- Extended Validation (EV): Best for e-commerce sites and large enterprises, displaying a green address bar and providing the highest level of trust.
Additionally, consider important factors like the number of domains or subdomains you need to secure. Some certificates cover multiple domains, which can be cost-effective for businesses with multiple sites. Below is a quick comparison table to help you evaluate:
| Certificate Type | Validation Level | Best For | Price Range |
|---|---|---|---|
| DV | Domain | Blogs, personal websites | $10 – $50/year |
| OV | Organization | Businesses | $50 – $100/year |
| EV | Extended | E-commerce, large enterprises | $100 – $500/year |
A Comprehensive Walkthrough of Installing SSL Certificates in WordPress
Installing an SSL certificate on your WordPress site is a crucial step in ensuring the security of your visitors’ data. Start by acquiring an SSL certificate from a trusted Certificate Authority (CA). Many web hosting providers now offer free SSL certificates through Let’s Encrypt, which can be a great option for small businesses and personal blogs. Once you have your SSL certificate, you’ll need to access your hosting control panel and look for the option to install the certificate. The process may vary depending on your host, but it usually involves the following steps:
- Log into your cPanel or web hosting control panel.
- Navigate to the SSL/TLS section.
- Upload your SSL certificate files.
- Activate the SSL certificate.
After successfully installing the certificate, the next step is to update your WordPress settings to serve your website over HTTPS. In your WordPress dashboard, go to Settings → General, and update the WordPress Address (URL) and Site Address (URL) to include “https://” instead of “http://”. This action ensures that visitors are directed to the secure version of your site. To redirect users from the HTTP to the HTTPS version seamlessly, you can edit the .htaccess file on your server using an FTP client or through the file manager in your control panel. Here’s a simple redirection rule you can add:
| Type | Redirection Rule |
|---|---|
| Standard | Redirect 301 / https://yourdomain.com/ |
| Force HTTPS | RewriteEngine On RewriteCond %{HTTPS} off RewriteRule ^ https://%{HTTP_HOST}%{REQUEST_URI} [L,R=301] |
Troubleshooting Common SSL Installation Issues in WordPress
Despite following the correct steps to install your SSL certificate, various issues can arise that may hinder your site’s secure connection. One of the most common problems is mixed content, where some resources are still loaded over HTTP instead of HTTPS. This can create a warning for users and deter them from visiting your site. To resolve this, you can use WordPress plugins like Really Simple SSL or manually check your theme and plugin files for hard-coded HTTP links. Consider performing a search and replace in your database using tools like Better Search Replace to ensure all instances of old URLs are updated.
Another frequent issue is the “SSL certificate not trusted” error, which can arise from various sources such as browser cache, incorrect server configuration, or an expired certificate. To troubleshoot this, clear your browser cache or try a different browser. Ensure that your certificate is correctly installed by checking it on sites like SSL Labs. If your certificate is valid, inspect your server settings. Verify that your .htaccess file has the correct redirect rules to enforce HTTPS and that your server is configured to serve your site securely. Below is a handy troubleshooting checklist:
| Issue | Solution |
|---|---|
| Mixed Content Warning | Use Really Simple SSL plugin or search and replace HTTP links |
| Certificate Not Trusted | Clear browser cache and verify SSL installation |
| Redirect Issues | Check .htaccess rules and server settings |
| Expired Certificate | Renew your SSL certificate with your provider |
In Retrospect
installing an SSL certificate on your WordPress site is a critical step toward ensuring security and building trust with your visitors. By following this step-by-step guide, you’ve learned how to seamlessly secure your website, protect sensitive data, and potentially boost your search engine rankings. Remember, an SSL certificate is not just a technical necessity; it’s a commitment to your users that their safety and privacy are paramount.
As you navigate your WordPress journey, consider revisiting this guide whenever you need a refresher or find yourself facing any issues. The digital landscape is ever-evolving, and keeping your site secure is an ongoing responsibility. Don’t hesitate to reach out in the comments below if you have any questions or share your experiences with SSL installation on WordPress. Together, we can foster a safer online environment for everyone. Happy securing!