Step-by-Step Guide to Installing SSL on Shared Hosting
Introduction:
In today’s digital landscape, ensuring the security and privacy of your website visitors is more important than ever. One of the most effective ways to achieve this is by installing an SSL (Secure Sockets Layer) certificate. Not only does SSL protect sensitive data exchanged between users and your site, but it also boosts your website’s credibility and improves its ranking on search engines. For those utilizing shared hosting, the process of SSL installation can seem daunting. However, with the right guidance, it can be a straightforward task. In this step-by-step guide, we’ll walk you through the entire process of installing SSL on shared hosting, simplifying each step so that you can enhance your website’s security with confidence. Whether you’re a seasoned webmaster or a beginner, you’ll find all the information you need to secure your site effectively. Let’s dive in!
Table of Contents
- Understanding SSL and Its Importance for Your Website
- Choosing the Right SSL Certificate for Shared Hosting
- Step-by-Step Installation Process of SSL on Shared Hosting
- Testing and Troubleshooting Your SSL Setup
- Insights and Conclusions
Understanding SSL and Its Importance for Your Website
Secure Sockets Layer (SSL) is a protocol that protects the data exchanged between a user’s browser and a web server. This cryptographic technology is crucial for any website, as it encrypts sensitive information such as login credentials, credit card numbers, and personal data, ensuring that unauthorized parties cannot access it. Implementing SSL not only enhances the security of your website but also builds trust with your visitors. Nowadays, users are more aware of online security; a website that lacks SSL may deter potential customers, leading to lost business opportunities.
Furthermore, modern search engines, including Google, prioritize SSL-enabled websites in their ranking algorithms. By securing your site with SSL, you not only protect your visitors but also improve your website’s visibility in search results. The transition to an HTTPS protocol, indicated by a padlock icon in the browser’s address bar, communicates to users that your site is safe to browse. To summarize, SSL is not just a technical requirement but a crucial element for establishing credibility and ensuring the secure exchange of information on your website.
Choosing the Right SSL Certificate for Shared Hosting
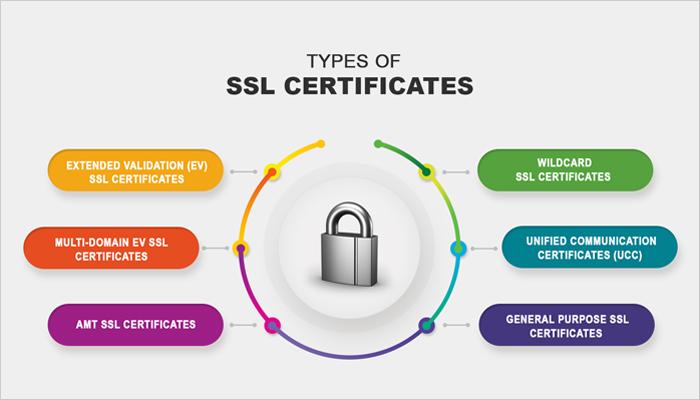
When selecting an SSL certificate for shared hosting, it’s essential to consider the unique characteristics of your website and its intended audience. Domain Validated (DV) SSL certificates are a popular choice for personal blogs and small businesses, providing essential security with minimal verification. For e-commerce sites or companies handling sensitive customer data, Organization Validated (OV) or Extended Validation (EV) certificates offer a higher level of assurance, showcasing your commitment to security with visible trust indicators in browsers. Additionally, some shared hosting providers offer bundled SSL options, which might simplify the process while saving costs.
While choosing the right SSL certificate, it’s also crucial to look at factors such as compatibility, support, and renewal practices. Here are some points to consider:
- Compatibility: Ensure the SSL certificate is compatible with your hosting provider.
- Support: Check if your host provides customer support during the installation process.
- Renewal Terms: Examine how easy it is to renew your SSL certificate.
By weighing these factors, you can confidently choose an SSL certificate that meets your needs while offering protection for your visitors.
Step-by-Step Installation Process of SSL on Shared Hosting
To start securing your website, begin by purchasing an SSL certificate from a reliable provider. Once you have obtained your SSL certificate, the first step is to log in to your shared hosting account’s control panel. Look for the SSL/TLS or similar section, which is typically featured prominently in the security options. Here, you may find an option to upload your SSL certificate. Upload the certificate files provided by your SSL issuer along with any intermediate certificate files if required. Make sure you also note your domain name, as this is essential for the installation process.
After uploading your certificate, navigate to the Manage SSL sites or equivalent section in the cPanel. Here, you can select the domain you want to secure. In the relevant fields, you will need to select or enter the certificate and private key you uploaded earlier. Be mindful of properly saving your changes. After a successful installation, you can verify that SSL is functioning correctly by visiting your website using “https://” instead of “http://”. If you see a padlock symbol in the address bar, congratulations, your SSL is properly configured!
Testing and Troubleshooting Your SSL Setup
Once you have installed your SSL certificate, it’s essential to test its configuration to ensure everything is functioning correctly. You can use various online tools to verify the installation and security of your SSL setup. Here are some popular options:
- SSL Labs – A comprehensive tool that provides a detailed report on your SSL configuration, including strengths and weaknesses.
- Why No Padlock? – This tool helps identify mixed content issues that can arise when some resources are not served securely.
- SSL Checker – A straightforward checker to confirm whether your certificate is properly installed and recognized by browsers.
If you encounter issues after installation, troubleshooting can help you resolve them effectively. Start by verifying that the certificate files are correctly linked in your web hosting control panel. Check for common pitfalls such as:
- Expired certificates that need renewal
- Improperly configured website settings that might prevent HTTPS access
- Firewall settings that could block secure connections
Additionally, you can inspect the web server configuration files for any inconsistencies or errors. Use the following table as a quick reference to identify some typical issues that might arise and their potential fixes:
| Issue | Solution |
|---|---|
| Certificate Not Trusted | Ensure all intermediate certificates are installed. |
| Mixed Content Warnings | Update all resources to load using HTTPS. |
| Site Loading Over HTTP | Implement HTTP to HTTPS redirects. |
Insights and Conclusions
Conclusion
Congratulations! You’ve successfully navigated through the intricacies of installing SSL on your shared hosting environment. By following this step-by-step guide, you’ve not only enhanced the security of your website but also built trust with your visitors. In today’s digital landscape, where online security is paramount, having an SSL certificate is not just a luxury—it’s a necessity.
Remember, the process may vary slightly depending on your hosting provider, so always refer to their specific documentation if you encounter any challenges. With your newfound skillset, you’re empowered to protect sensitive information and improve your site’s SEO ranking.
If you found this guide helpful, don’t hesitate to share it with others who may benefit and feel free to leave any questions or experiences you’d like to share in the comments below. Happy securing!