Step-by-Step Guide to Install WordPress on Shared Hosting
Introduction:
In today’s digital landscape, establishing an online presence is essential for businesses, bloggers, and creatives alike. One of the most popular platforms for building a website is WordPress, thanks to its user-friendly interface, flexibility, and a vast array of plugins and themes. For those just starting, shared hosting is a cost-effective option that allows you to get your website up and running without breaking the bank. However, navigating the installation process can be daunting for beginners. In this step-by-step guide, we will walk you through the entire process of installing WordPress on shared hosting, ensuring you have a smooth and hassle-free experience. Whether you’re launching a personal blog or a business site, our comprehensive instructions will empower you to bring your vision to life and step confidently into the world of WordPress.
Table of Contents
- Understanding Shared Hosting for WordPress Installation
- Preparing Your Hosting Environment for a Seamless Setup
- Efficiently Installing WordPress via cPanel
- Essential Configuration and Security Measures Post-Installation
- Final Thoughts
Understanding Shared Hosting for WordPress Installation
Shared hosting is an economical solution for individuals and small businesses looking to host their WordPress sites. It operates on a server which is shared by multiple users, leading to lower costs but also shared resources. When you opt for shared hosting, your site will leverage the following benefits:
- Affordability: Ideal for beginners, shared hosting plans are typically cost-effective, allowing you to start your website without breaking the bank.
- Easy Setup: Most shared hosting providers offer one-click WordPress installation, streamlining the process for users who may not have technical expertise.
- Maintenance and Support: Shared hosting often includes customer support for issues related to both hosting and WordPress, giving you peace of mind.
However, it’s essential to consider potential limitations of shared hosting. Resource allocation can affect site performance, particularly if your site experiences sudden traffic spikes. Additionally, because multiple users share the same server, security can be a concern. To make informed choices, consider the following attributes when selecting your shared hosting provider:
| Feature | Importance |
|---|---|
| Server Uptime Guarantee | Above 99.9% ensures your site is accessible at all times. |
| Daily Backups | Regular backups protect your data and make recovery easier. |
| Scalability Options | Ability to upgrade as your website grows to handle more traffic. |
Preparing Your Hosting Environment for a Seamless Setup
Before diving into the installation process, it’s crucial to ensure that your shared hosting environment is adequately configured for WordPress. First, check that your hosting plan meets the basic requirements. Look for the following:
- PHP Version: Ensure at least PHP 7.4 or above is installed.
- MySQL Version: A minimum of MySQL 5.7 or MariaDB 10.3 is recommended.
- HTTPS Support: SSL certificate should be enabled to enhance security.
- File Permissions: Proper permissions (755 for directories and 644 for files) are essential.
Once you’ve confirmed these requirements, it’s time to optimize your server settings for an efficient WordPress experience. Consider the following steps:
- Enable Mod_rewrite: Ensure URL rewriting is enabled for pretty permalinks.
- Increase Memory Limit: Adjust the PHP memory limit to at least 128MB for better performance.
- Optimize PHP Settings: Check max_execution_time and upload_max_filesize settings to accommodate larger uploads and scripts.
Efficiently Installing WordPress via cPanel
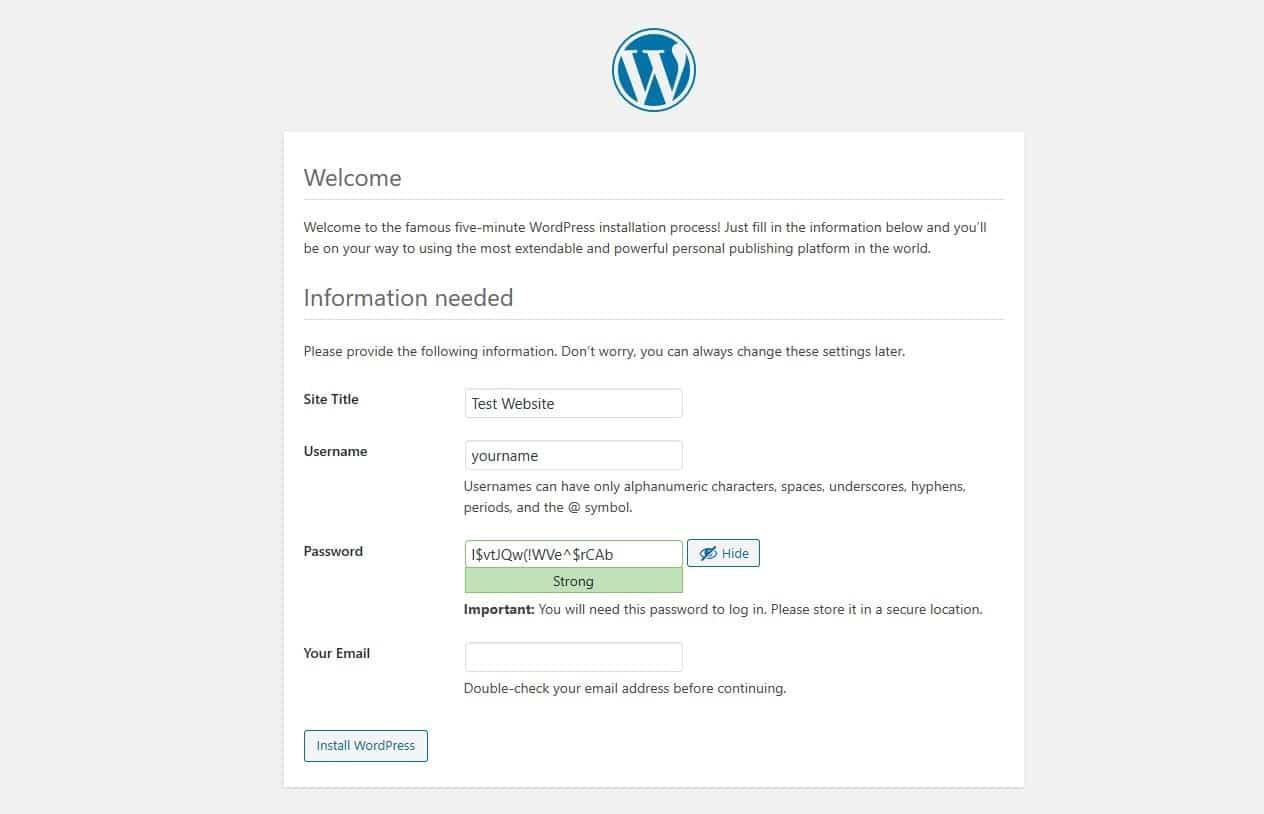
Installing WordPress through cPanel is a straightforward process that can be completed in just a few steps. First, log into your cPanel account and navigate to the Softaculous Apps Installer or WordPress installer option, typically found under the “Software” section. Once there, click on the WordPress icon to begin your installation. Make sure to fill out the necessary details, including your website name, admin username, and password. It’s recommended to choose complex passwords for security. After configuring these, select your desired protocol (HTTP or HTTPS) to secure your site, and choose the domain where you want to install WordPress.
Next, configure additional options such as the site description, admin email, and language preferences. Softaculous also provides options to select plugins and themes during installation. After review, click on the Install button, and the automated process will begin. You can monitor the progress, and upon completion, you’ll receive a success message along with your website and admin URL links to access your new WordPress site. Remember to perform some post-installation tasks, such as setting up permalinks and installing essential plugins to optimize your website.
Essential Configuration and Security Measures Post-Installation
After successfully installing WordPress, it’s vital to secure your website against potential threats and to configure key settings that enhance performance and usability. Here are some essential steps to follow:
- Change the default login URL: Modify the WordPress login URL from the standard wp-login.php to something unique to reduce the risk of brute-force attacks.
- Strengthen user passwords: Ensure all user accounts utilize strong passwords and consider implementing two-factor authentication for added security.
- Regular backups: Set up a backup solution that automatically saves your website data regularly, allowing for easy recovery in case of an incident.
- Update regularly: Keep WordPress core, themes, and plugins updated to the latest versions to patch vulnerabilities and improve performance.
Next, adjust your site’s configuration settings to optimize its performance and user experience. Consider the following measures:
| Configuration Setting | Recommended Value | Notes |
|---|---|---|
| Timezone | Your Local Timezone | Ensures correct scheduling of posts and activities. |
| Permalink Structure | /post-name/ | Improves SEO and readability of URLs. |
| Discussion Settings | Moderation for Comments | Prevents spam and enhances community engagement. |
By implementing these security and configuration measures, you fortify your WordPress site against potential threats, while also enhancing the overall performance and user experience. Taking the time to set these essentials will save you from more significant issues down the line.
Final Thoughts
Conclusion
Congratulations! You’ve successfully navigated the journey of installing WordPress on your shared hosting platform. By following this step-by-step guide, you’ve not only set up your website but also empowered yourself with the skills to manage and grow it moving forward.
With WordPress’s robust features at your fingertips, you can now customize your site to reflect your unique brand, engage with your audience, and even monetize your content if you choose. Remember, the installation is just the beginning; the real magic happens as you dive into themes, plugins, and content creation.
As you embark on this exciting digital endeavor, don’t hesitate to explore the WordPress community, tap into online resources, and seek support when needed. The more you learn, the more your website will flourish.
Thank you for following along, and best of luck with your new WordPress site! We can’t wait to see what you create. If you have any questions or want to share your progress, feel free to drop a comment below. Happy blogging!